ArcGIS Accounts, Keys, and Tokens
There are several different ways that Esri, the company behind ArcGIS, allows you to authenticate your application with and utilize their data services. If you are brand new to ArcGIS, the Location Platform is a great place to start. If you already have an ArcGIS Online or ArcGIS Enterprise account, jump to this section to get started. If you want a deep dive into the various authentication methods available, check out Esri’s Types of authentication document. If all of your users will have ArcGIS accounts, or you want to manage more short-lived tokens, you can use User and App Authentication with OAuth2 tokens, which are more secure than API keys. To learn how to incorporate these authentication methods into your GeoBlazor application, see the Authentication page.
Api Keys
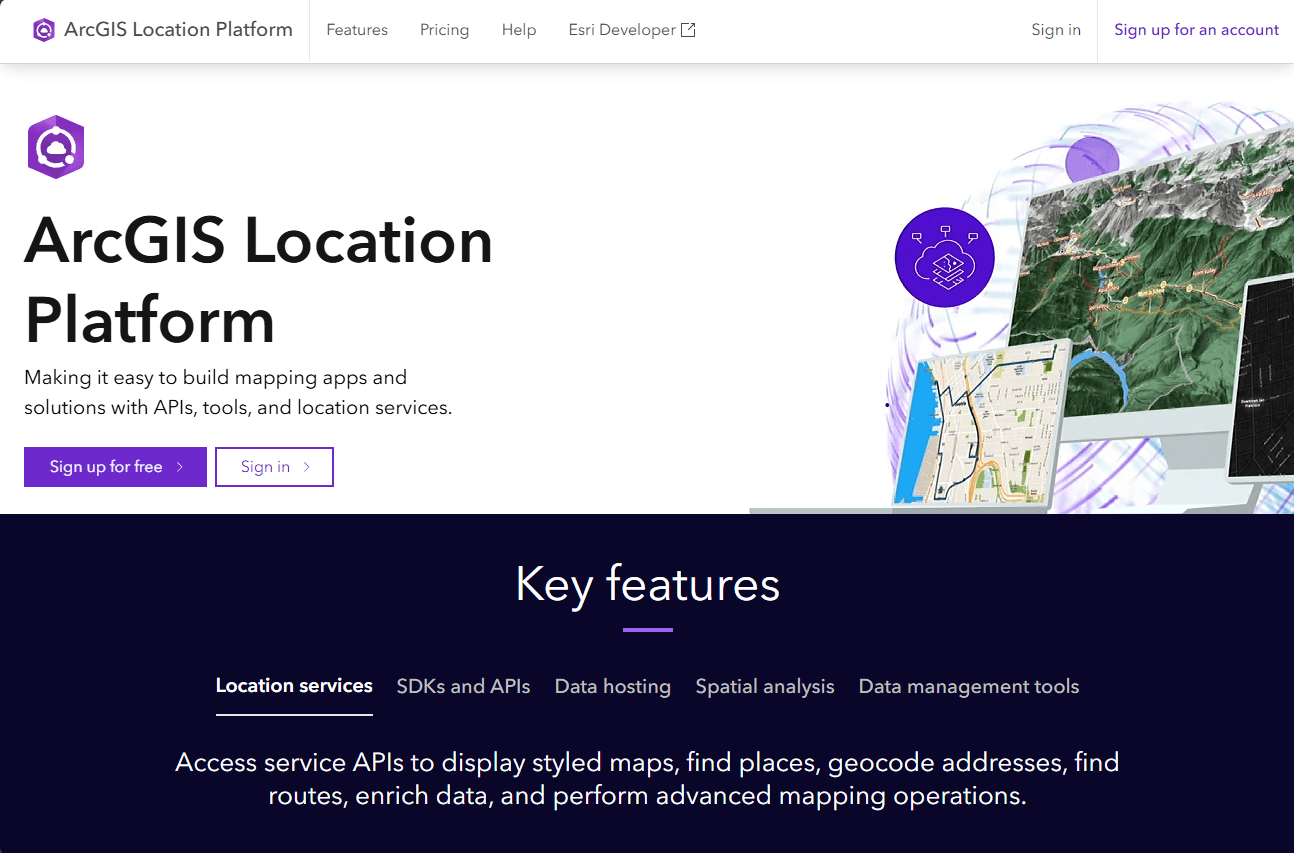
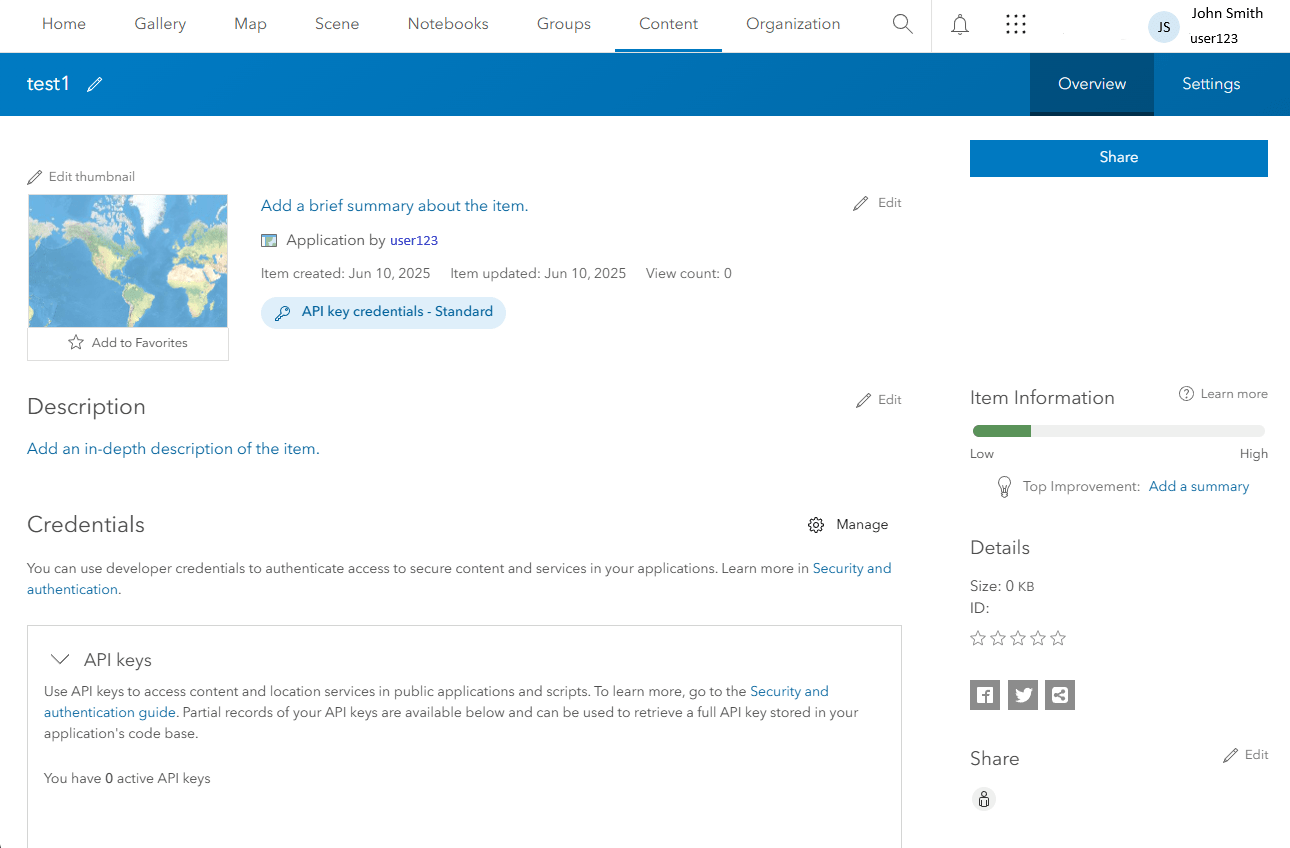
Api keys are the simplest way to authenticate your GeoBlazor application with ArcGIS. They are long-lived, easy to create, and do not require your users to sign in. However, they are tied to your developer account, so you will be responsible for any usage fees incurred by your application. If you are just getting started with ArcGIS, this is the recommended way to authenticate your application. You can create an API key in the ArcGIS Location Platform or from your ArcGIS Online or ArcGIS Enterprise account.
Pros/Cons
- Pros:
- Easy to create
- Long-lived token
- Requires no sign-in by end user
- Cons:
- An API Key could potentially be copied from the client browser, as it is consumed in the JavaScript, or if it is stored in a file loaded into Wasm on the client
- API Keys are tied to your developer account, which means you or your company will be responsible for all usage fees if/when you pass the free tier of usage
From Location Platform
The ArcGIS Location Platform provides a simple way to create an account, generate API keys, and access various ArcGIS services, all on a pay-as-you-go plan with a generous free tier. These instructions will show you how to quickly sign up and create your first API key, which you can then use in your GeoBlazor application. To learn about
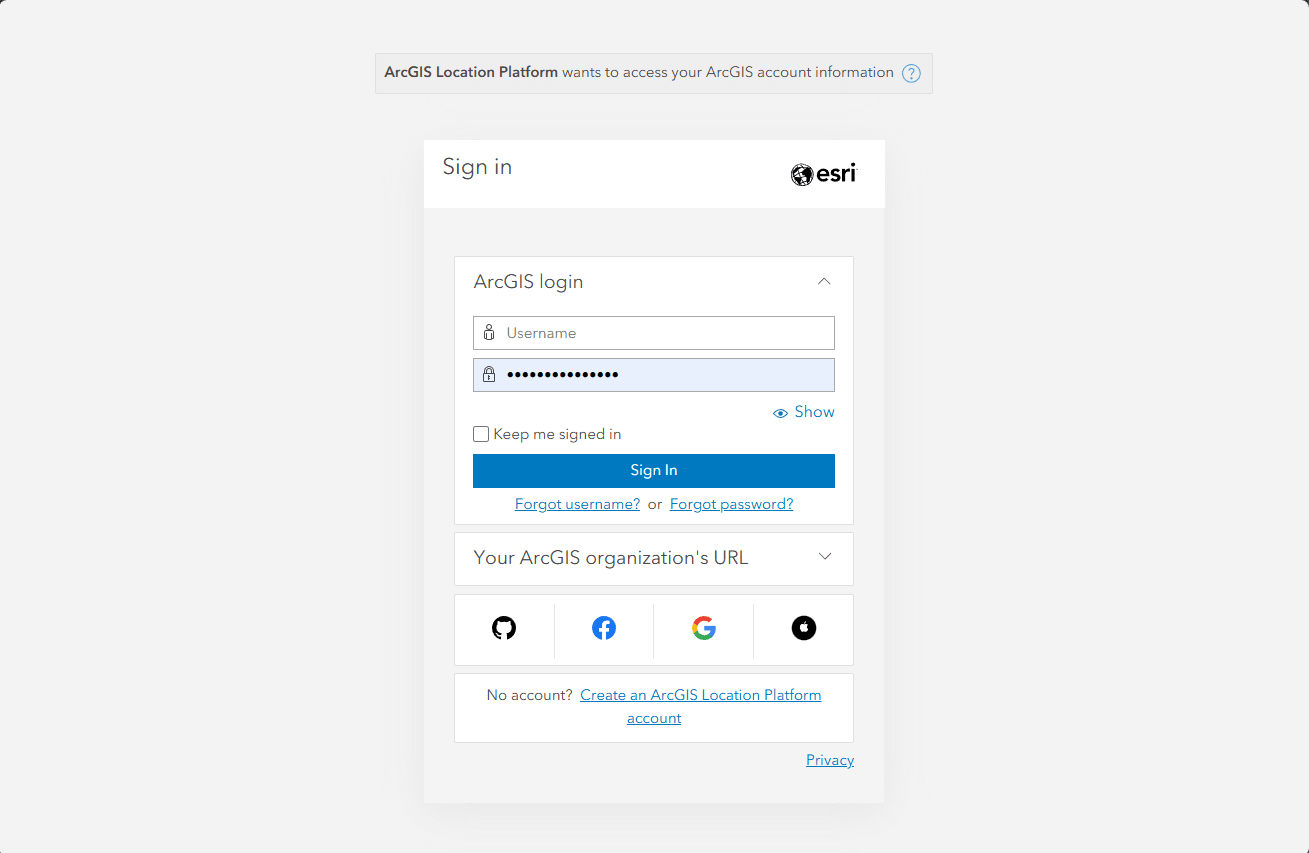
- Click Sign up for free to create an account.
- Once registered, choose Sign In.
- This is the Location Platform Dashboard, where you can manage your API keys, applications, and billing. Click on
Create developer credentialson the right side to get started.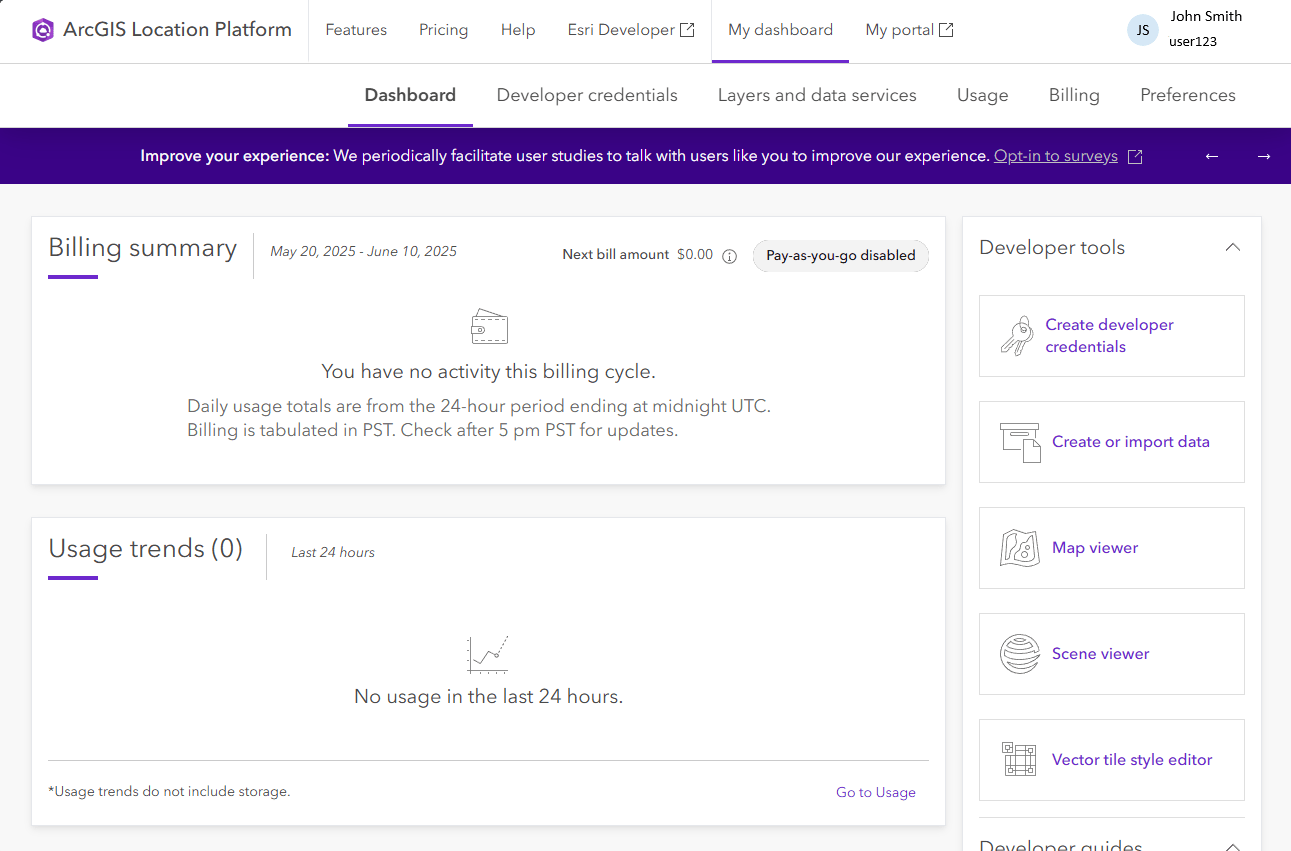
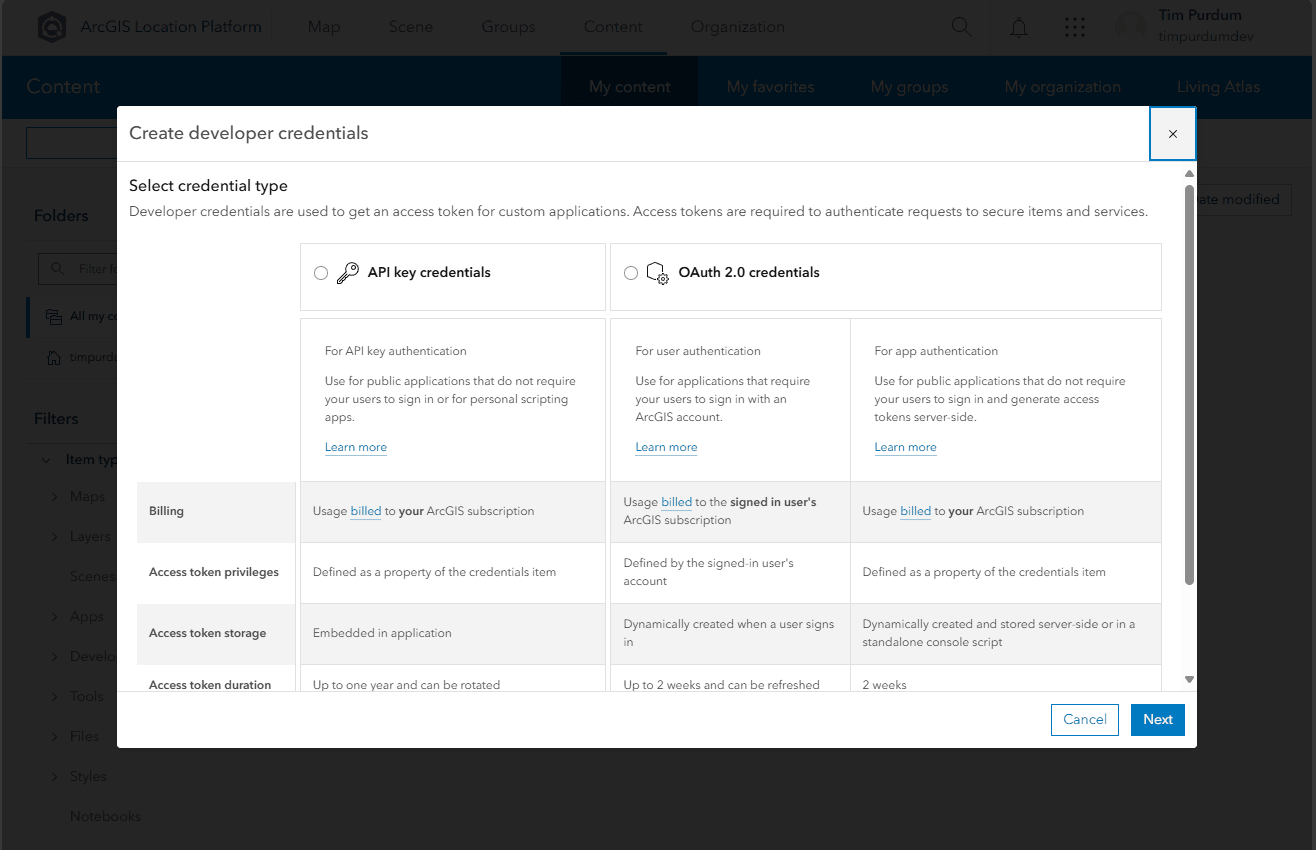
- You can create an API Key or an OAuth Application. For the simplest approach, choose API key credentials. Directions for OAuth 2.0 credentials are here.
- Set an expiration date for your API key, up to one year in the future. Add referrers if you want to ensure that your key can only be used from your website or application. Click
Nextwhen done.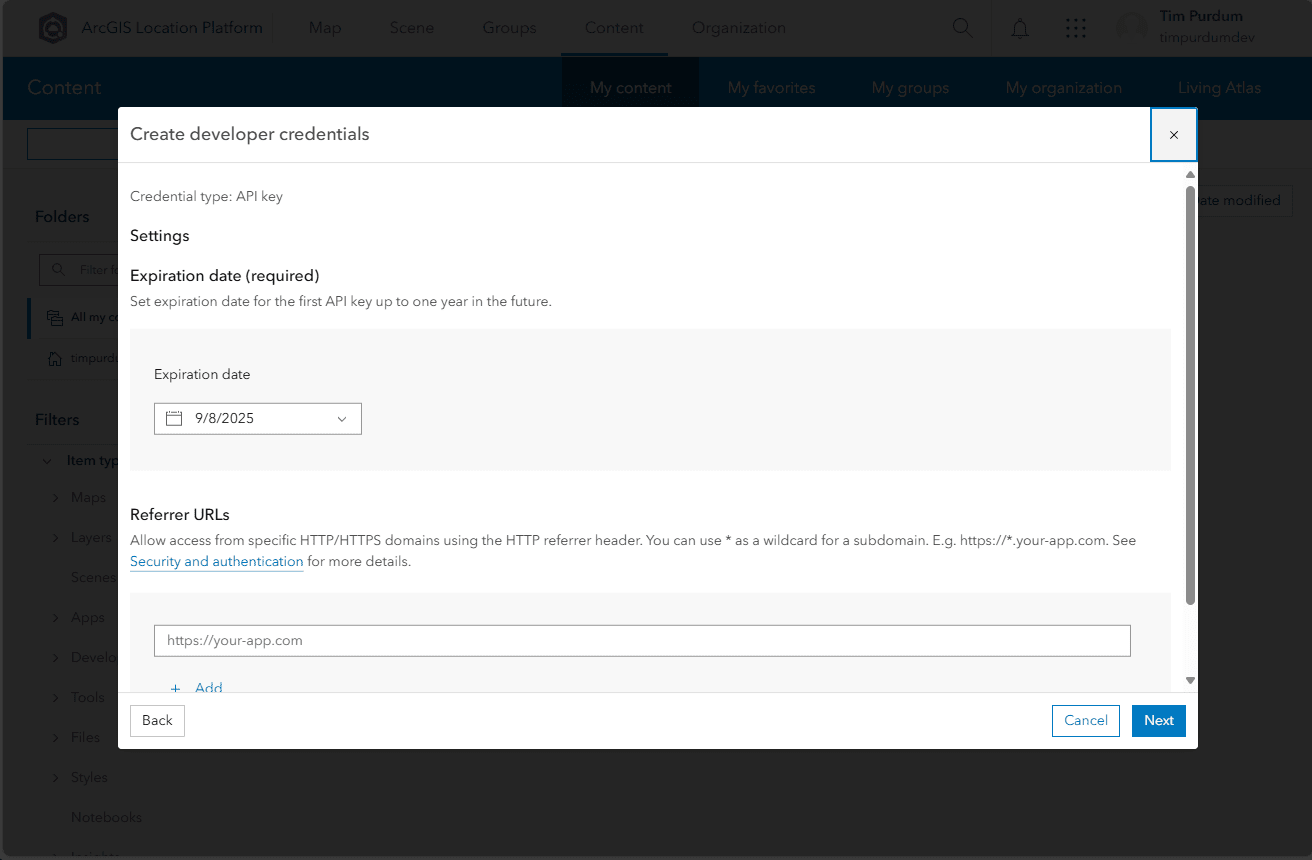
- Choose which ArcGIS services you want to enable for your API key. You should at minimum enable the
Basemapsservices. ClickNextwhen done.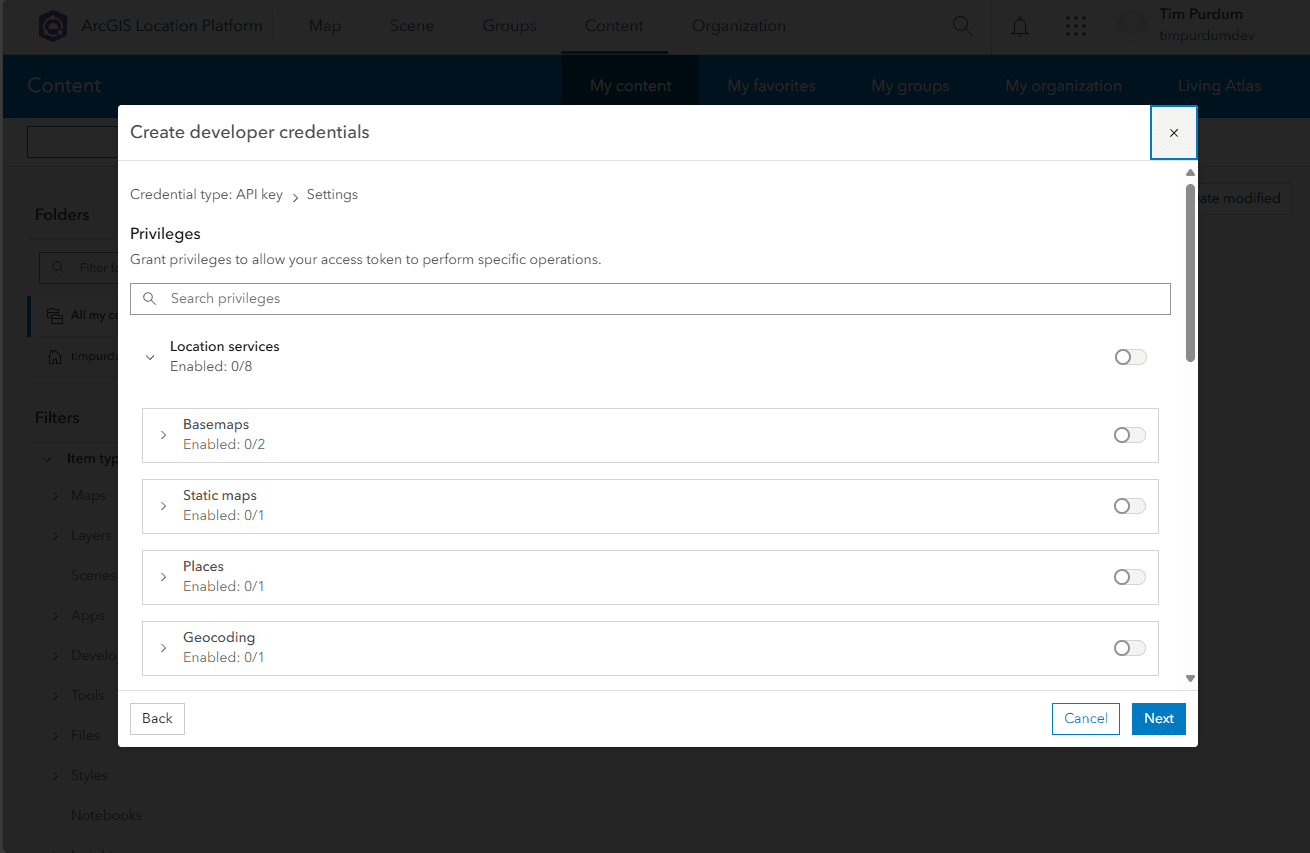
- If you ever create private feature services or other data, you can grant access to those services with your API key here. Select items or choose
Skip.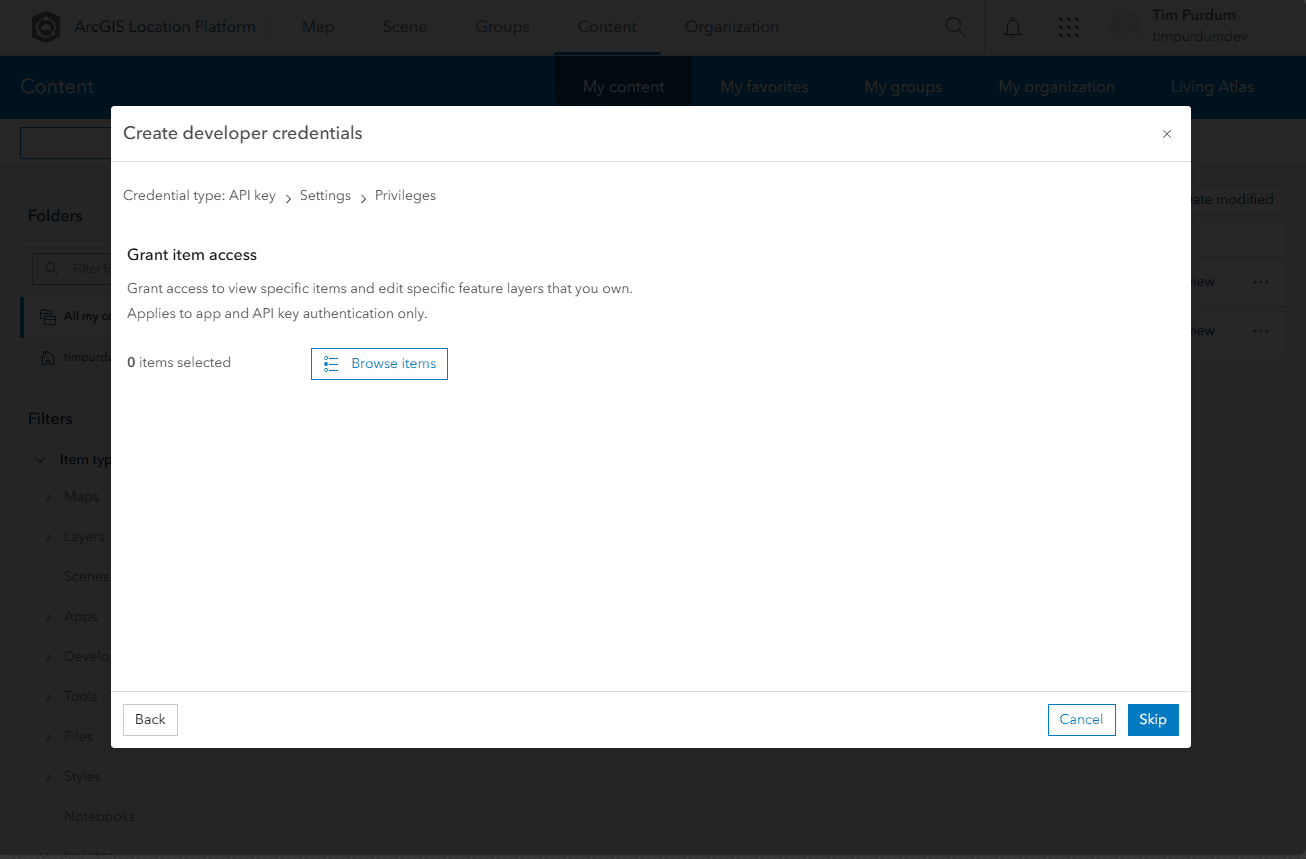
- Give your API key a name, select a folder, category, and tags, and write a summary if you choose. Then click
Next.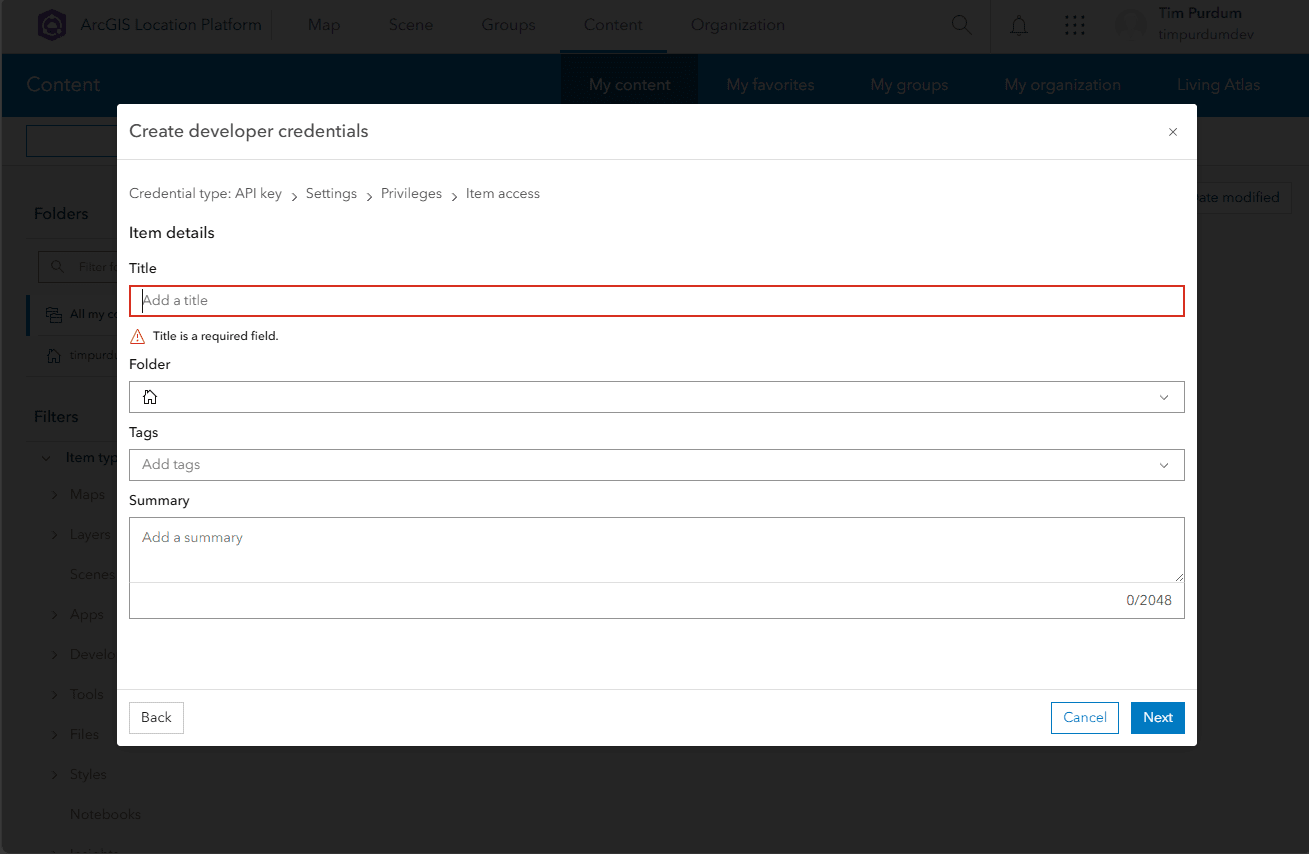
- Review your API key details and click
Next.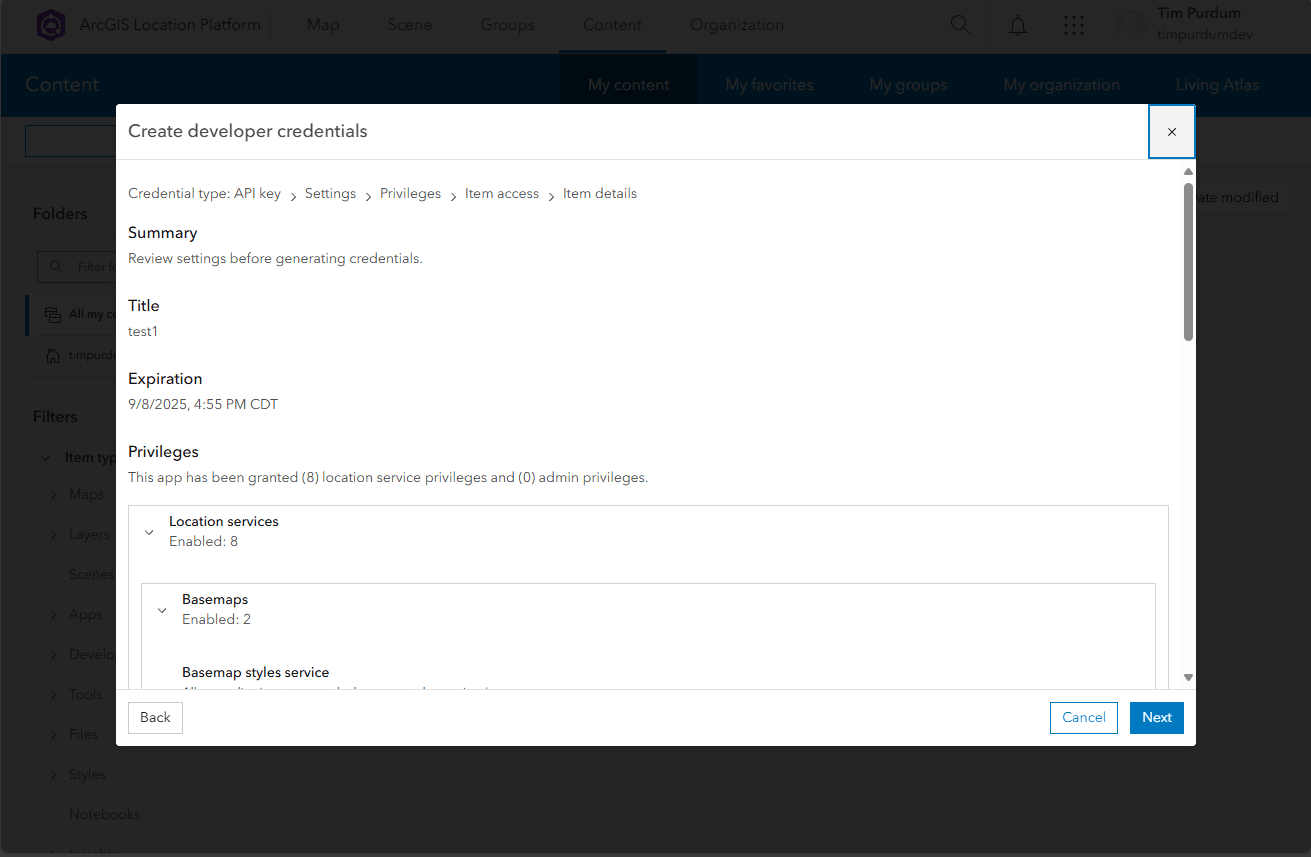
- Be prepared to copy your API key and store it somewhere secure, as you will not be able to see it again. When ready, click
Next.
- That’s it! You now have an API key that you can use in your GeoBlazor application. You can also create additional API keys or OAuth applications from the dashboard as needed.


From ArcGIS Online and ArcGIS Enterprise
ArcGIS Online and ArcGIS Enterprise are both web-based portals that allow you to manage personal or organizational data and share maps and applications. ArcGIS Online is a Software as a Service (SaaS) offering, while ArcGIS Enterprise is a self-hosted solution that provides more control over your data and services.
If you already have an ArcGIS Online or ArcGIS Enterprise account, you can sign in to your account to create an API key for GeoBlazor.
- Sign in to your ArcGIS Online or ArcGIS Enterprise account.
- Click on the Content and My Content (for ArcGIS Online) tabs in the top navigation bars. Then click the
New Itembutton on the left side.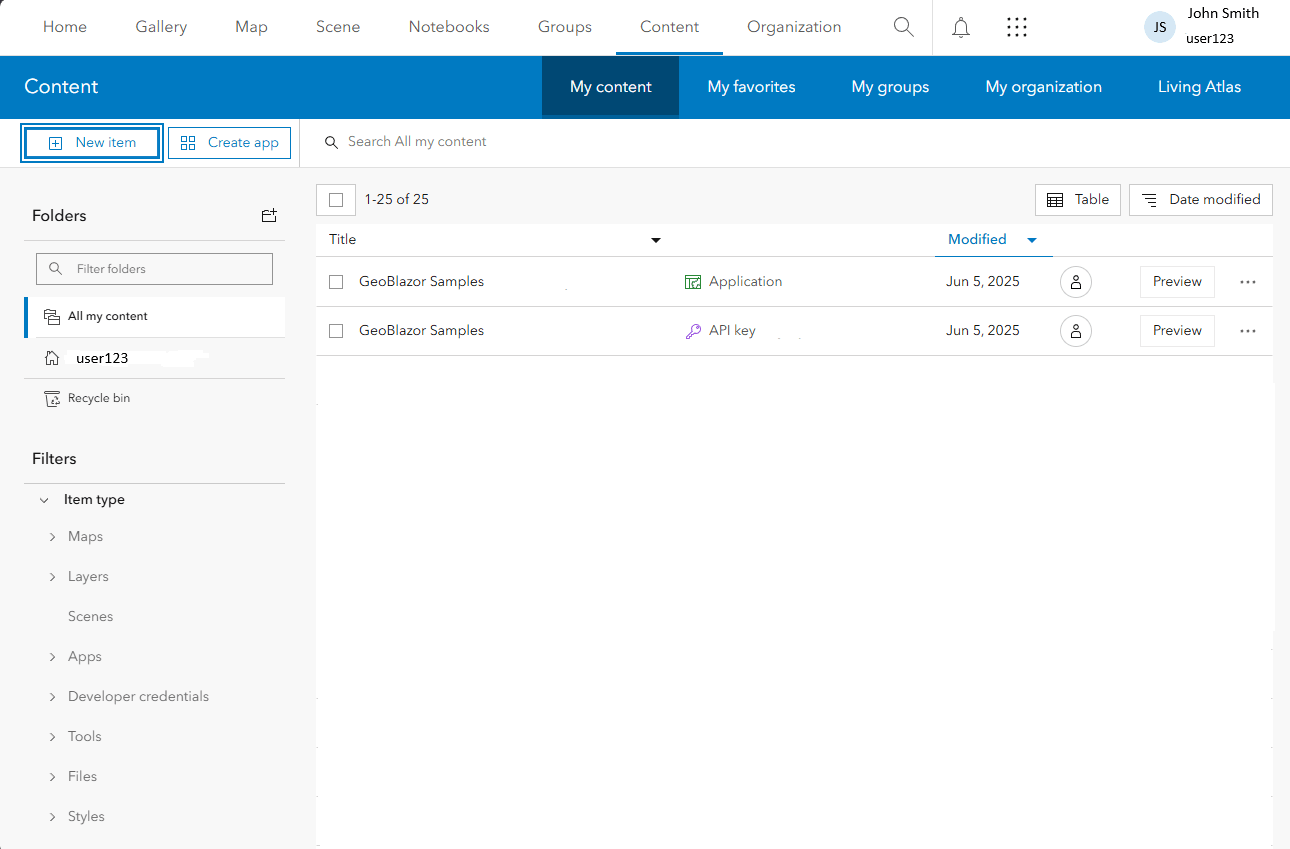
- Select
Developer credentialsfrom the left column.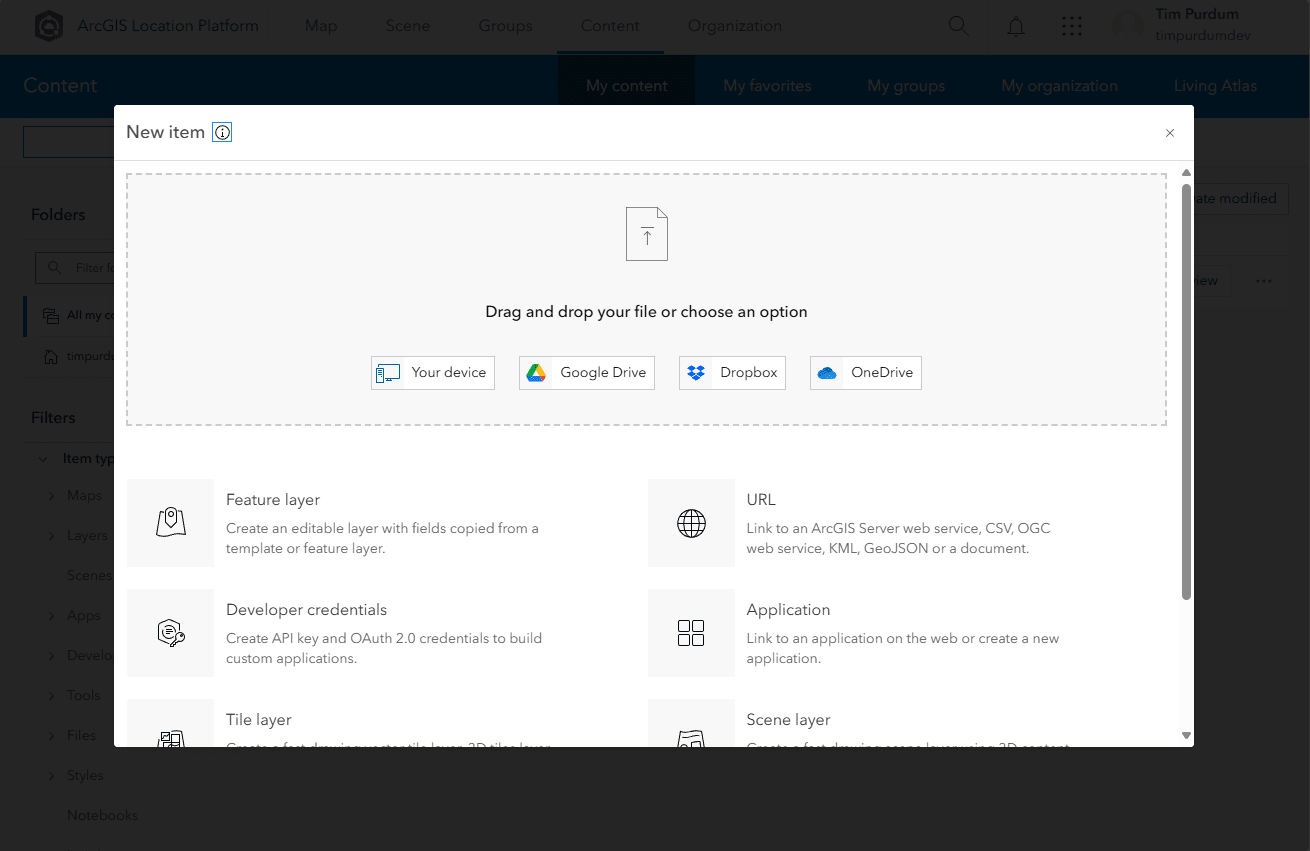
- You can create an API Key or an OAuth Application. For the simplest approach, choose API key credentials. Directions for OAuth 2.0 credentials are here.
- Set an expiration date for your API key, up to one year in the future. Add referrers if you want to ensure that your key can only be used from your website or application. Click
Nextwhen done. - Choose which ArcGIS services you want to enable for your API key. You should at minimum enable the
Basemapsservices. ClickNextwhen done. - If you ever create private feature services or other data, you can grant access to those services with your API key here. Select items or choose
Skip. - Give your API key a name, select a folder, category, and tags, and write a summary if you choose. Then click
Next. - Review your API key details and click
Next. - Be prepared to copy your API key and store it somewhere secure, as you will not be able to see it again. When ready, click
Next. - That’s it! You now have an API key that you can use in your GeoBlazor application. You can also create additional API keys or OAuth applications from the dashboard as needed.


OAuth2 Credentials (User and App Authentication)
OAuth is a more secure way to authenticate with ArcGIS. There are two ways to use OAuth: User Authentication and App Authentication. User Authentication allows users to log in with their ArcGIS accounts, which is useful and simple for private applications in organizations that already have company-wide ArcGIS accounts. App Authentication allows you to authenticate the application itself using a ClientSecret to request access tokens. Like API keys, App Authentication does not require users to sign in, but it is more secure than API keys because it uses short-lived tokens.
You can generate a new OAuth Application from the ArcGIS Location Platform or from your ArcGIS Online or ArcGIS Enterprise account.
Pros/Cons
User Authentication
- Pros:
- Very secure, no chance of stealing your long-lived token or racking up charges on your account
- Short-lived token
- Grants access to online items (maps, layers, etc.) in the user’s portal
- Charges are levied against the user’s organizational account
- Cons:
- Requires registered ArcGIS Accounts for all users
- Not currently supported for Blazor Hybrid in MAUI
App Authentication
- Pros:
- Very secure, no chance of stealing your long-lived token or racking up charges on your account
- Short-lived token
- Charges are levied against the application’s account
- Cons:
- Requires registered ArcGIS Application with ClientSecret
- Requires writing custom token refresh logic
- Not currently supported for Blazor Hybrid in MAUI
From Location Platform
- Sign in to the ArcGIS Location Platform.
- Click on
Create developer credentialson the right side to get started. - Select
OAuth 2.0 credentialsfrom the right column. - Set a
Redirect URLwhere users will be redirected after logging in. This is typically the URL of your application, such ashttps://yourapp.com/auth/callback. Also addReferrer URLshere to ensure that your OAuth application can only be used from your website or application. ClickNextwhen done.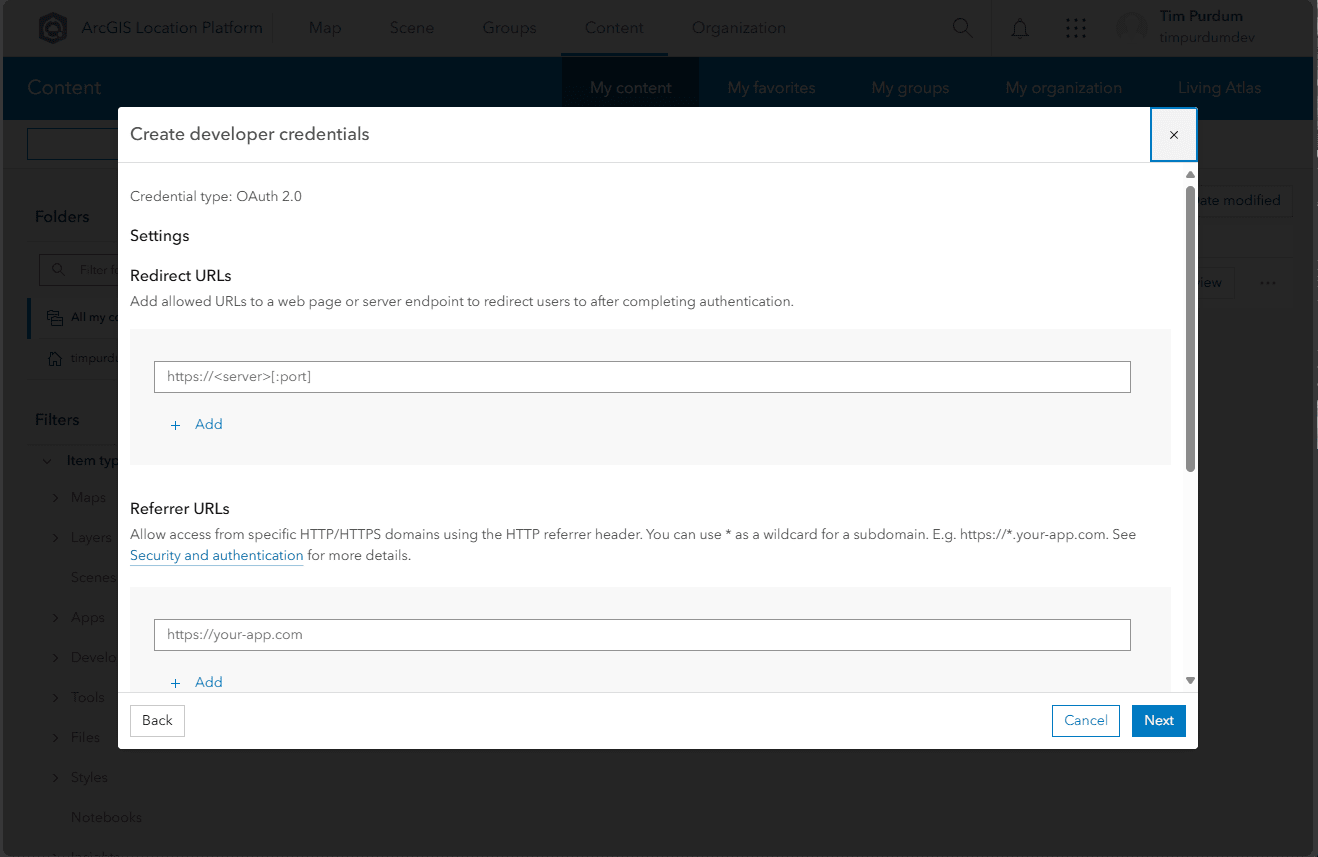
- Choose which ArcGIS services you want to enable for your application. You should at minimum enable the
Basemapsservices. ClickNextwhen done.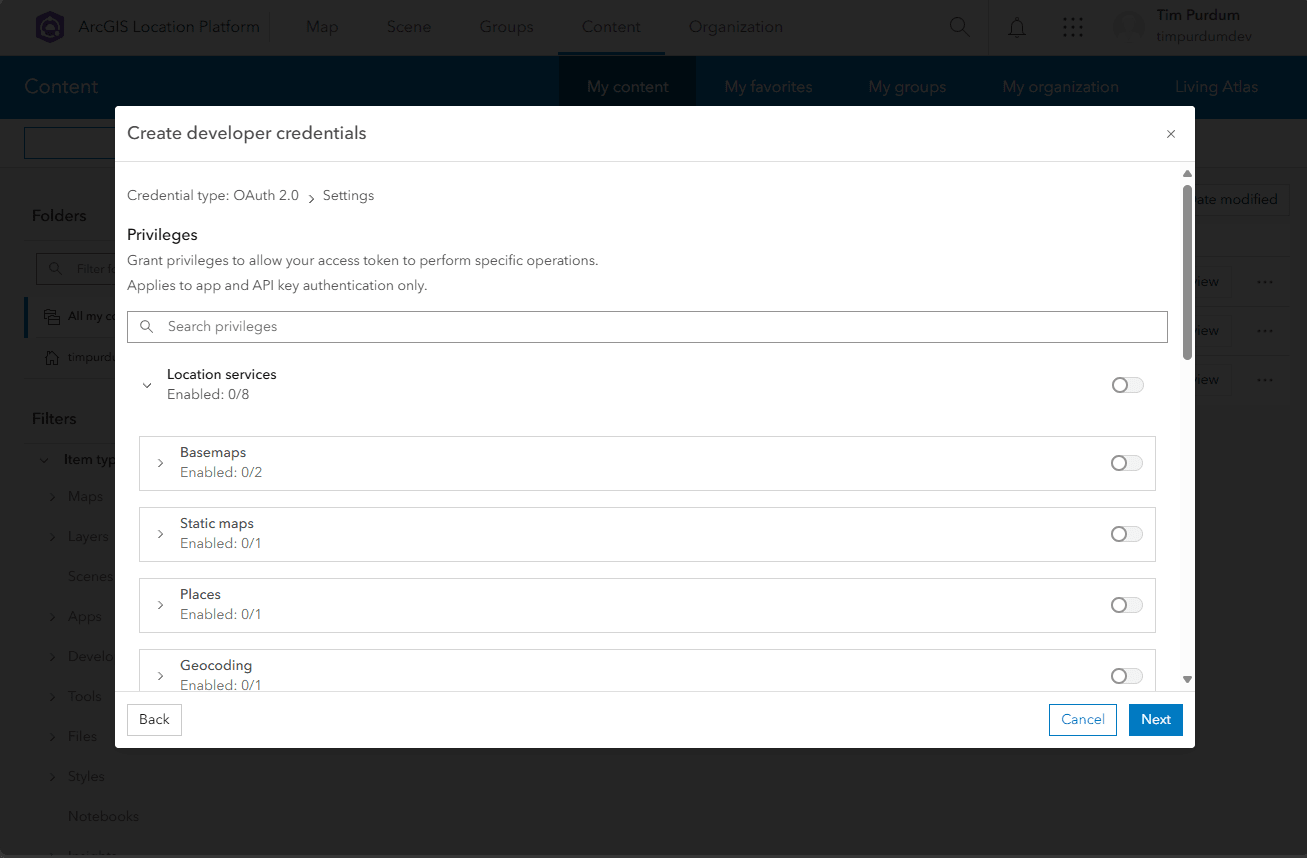
- If you ever create private feature services or other data, you can grant access to those services from your application here. Select items or choose
Skip.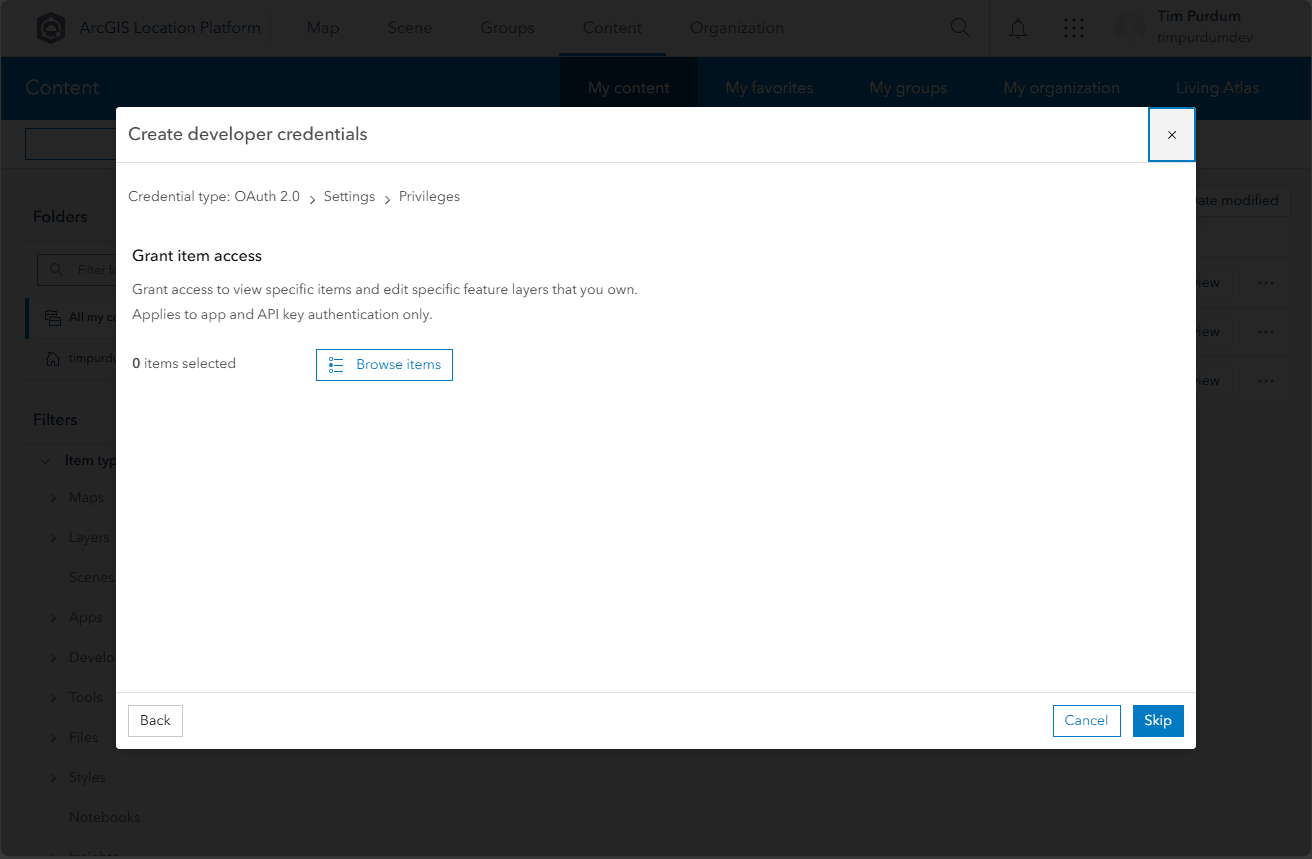
- Give your OAuth application a name, select a folder, add tags, and write a summary if you choose. Then click
Next.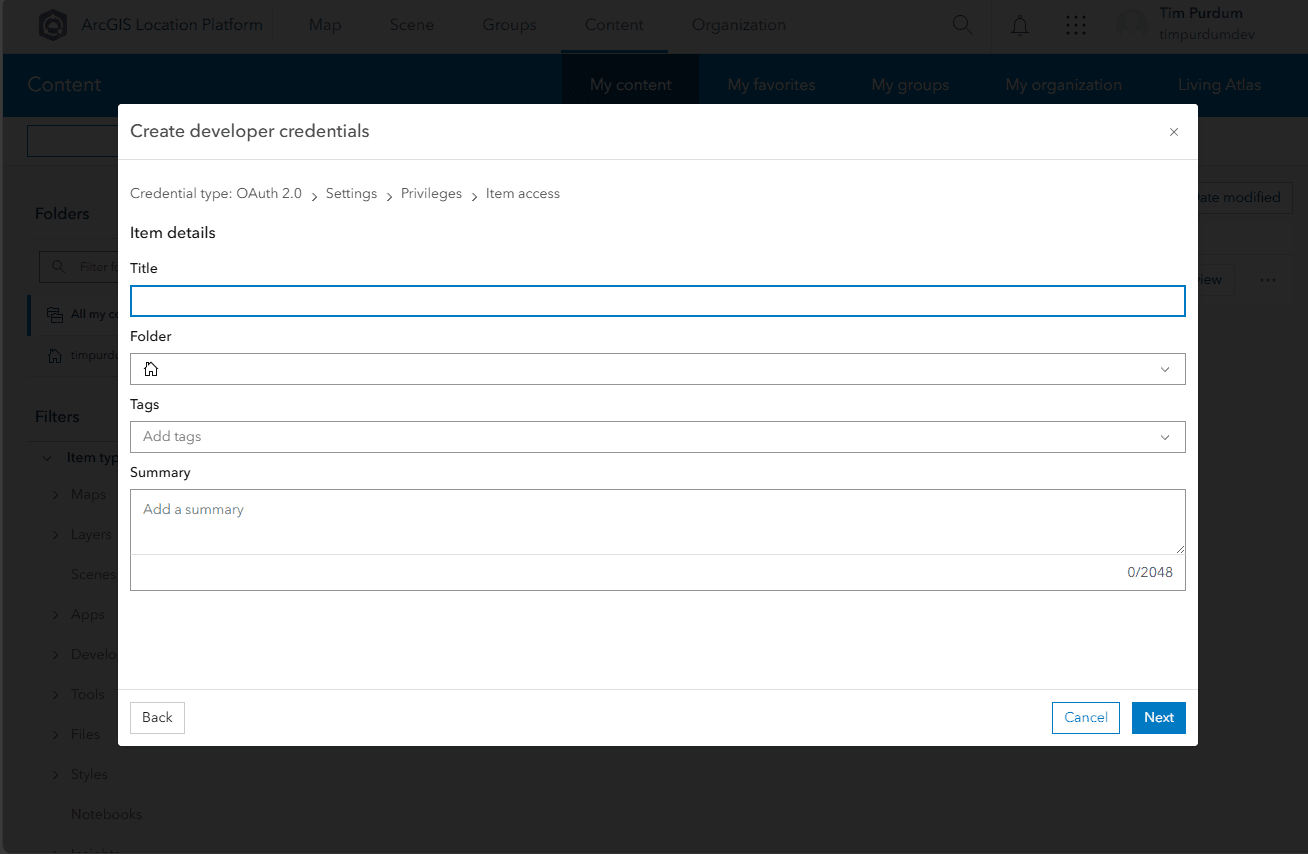
- Review your OAuth application details and click
Create.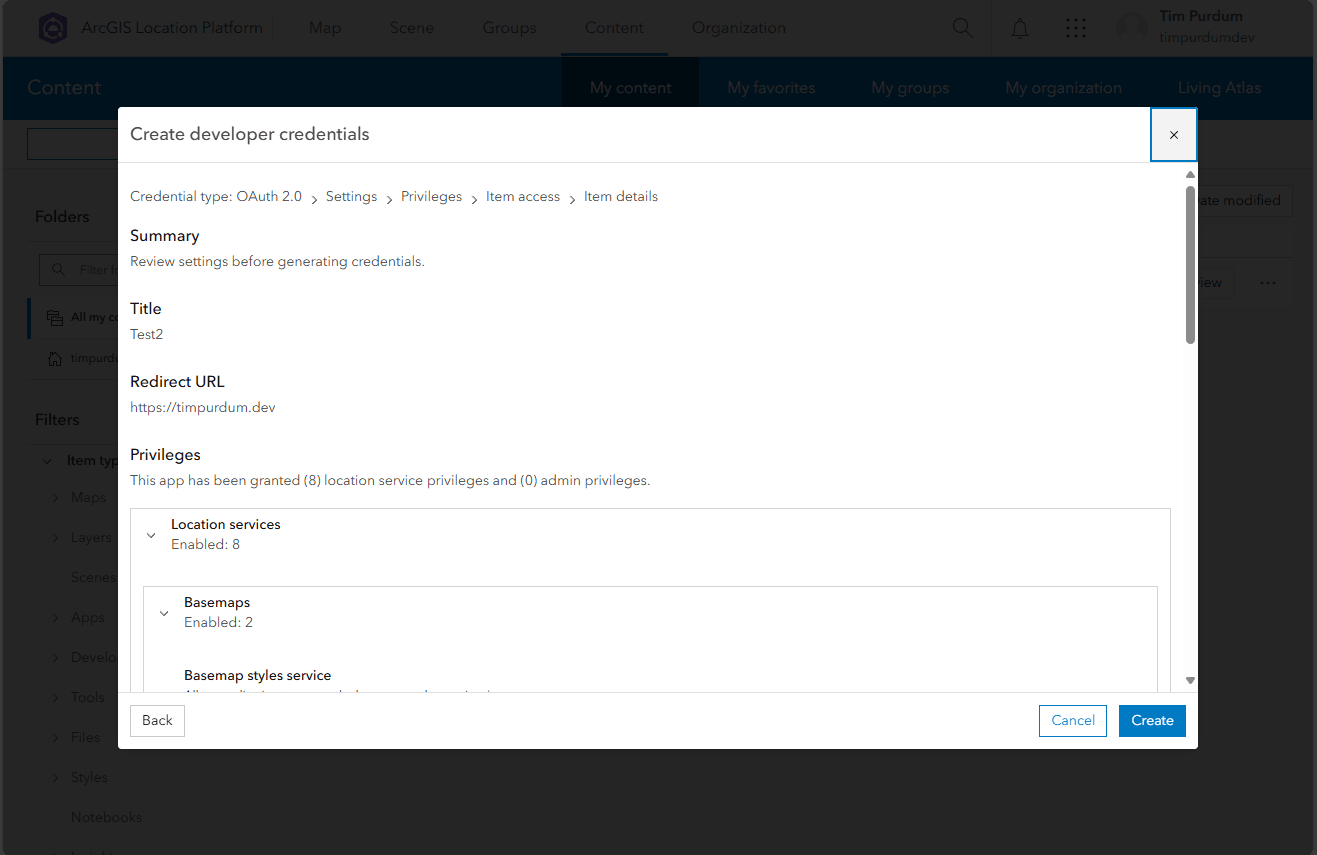
- That’s it! You now have an OAuth application that you can use in your GeoBlazor application. The
ClientIdavailable on the item detail page should be added to your GeoBlazor appsettings as theArcGISAppId. See Authentication for more details on using App Authentication in GeoBlazor.


From ArcGIS Online and ArcGIS Enterprise
- Sign in to your ArcGIS Online or ArcGIS Enterprise account.
- Click on the Content and My Content (for ArcGIS Online) tabs in the top navigation bars. Then click the
New Itembutton on the left side. - Select
Developer credentialsfrom the left column. - Select
OAuth 2.0 credentialsfrom the right column. - Set a
Redirect URLwhere users will be redirected after logging in. This is typically the URL of your application, such ashttps://yourapp.com/auth/callback. Also addReferrer URLshere to ensure that your OAuth application can only be used from your website or application. ClickNextwhen done. - Choose which ArcGIS services you want to enable for your application. You should at minimum enable the
Basemapsservices. ClickNextwhen done. - If you ever create private feature services or other data, you can grant access to those services from your application here. Select items or choose
Skip. - Give your OAuth application a name, select a folder, add tags, and write a summary if you choose. Then click
Next. - Review your OAuth application details and click
Create. -
That’s it! You now have an OAuth application that you can use in your GeoBlazor application. The
ClientIdavailable on the item detail page should be added to your GeoBlazor appsettings as theArcGISAppId. See Authentication for more details on using App Authentication in GeoBlazor. - and then store the
ClientIdin your application configuration asArcGISAppId.
Users will be prompted to log in automatically on the first map load if you add PromptForOAuthLogin="true" to your MapView, or you can use the AuthenticationManager.Login() method to trigger the login prompt.
<MapView PromptForOAuthLogin="true">
    <Map>
        <Basemap>
            <BasemapStyle Name="BasemapStyleName.ArcGisTopographic" />
        </Basemap>
    </Map>
</MapView>
For ArcGIS Enterprise logins, you need to provide one more item in the application configuration, ArcGISPortalUrl, typically ending with /portal. This will ensure that when the OAuth login is triggered, the user is directed to the correct portal.
{
    "ArcGISAppId": "ARCGIS_CLIENT_ID",
    "ArcGISPortalUrl": "https://arcgis.yourcompany.com/portal"
}
To do secure App OAuth, it is best to refresh tokens automatically. See App Authentication Token Refresh for an example of how to implement this pattern.